Custom Barn Quilt Chairs
- By design
- •
- 03 Feb, 2019
Custom projects: our favorite!
At Inspired by the Farm, we love creating custom pieces for our clients. Not only does it give us a chance to exercise our creative muscles, but it also allows us to work directly with our customers to create something unique that we know they’ll love.
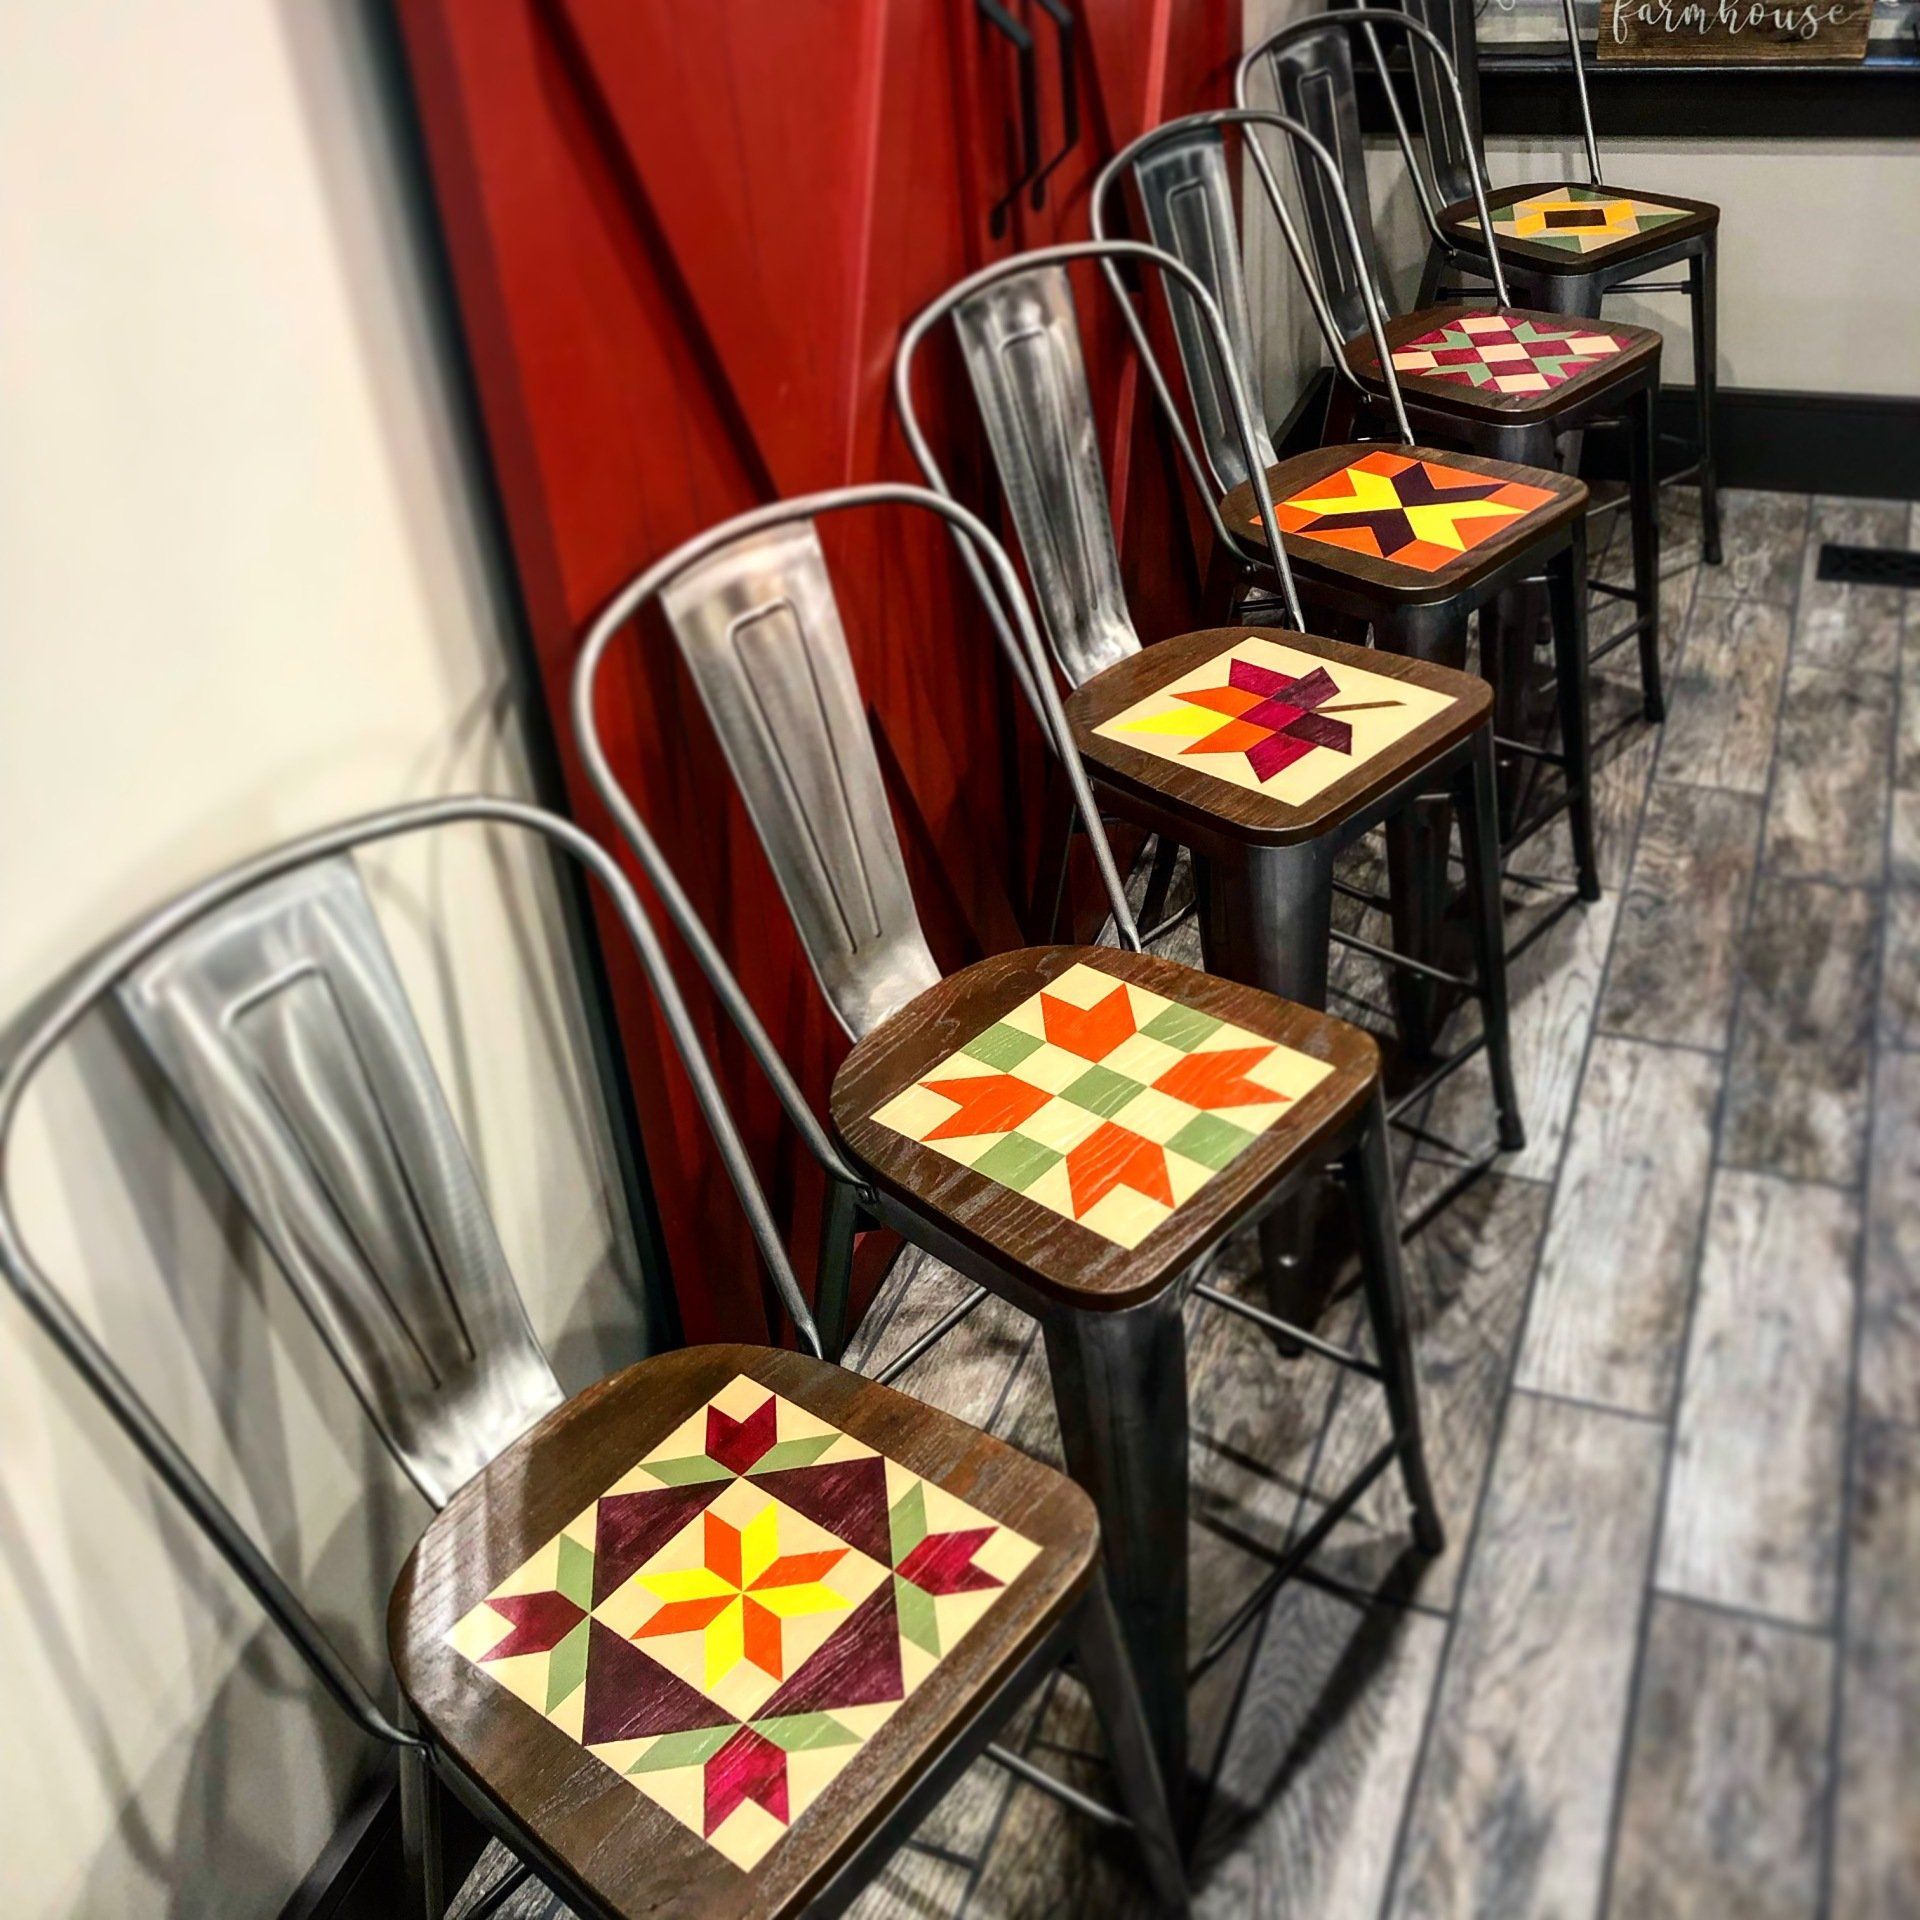
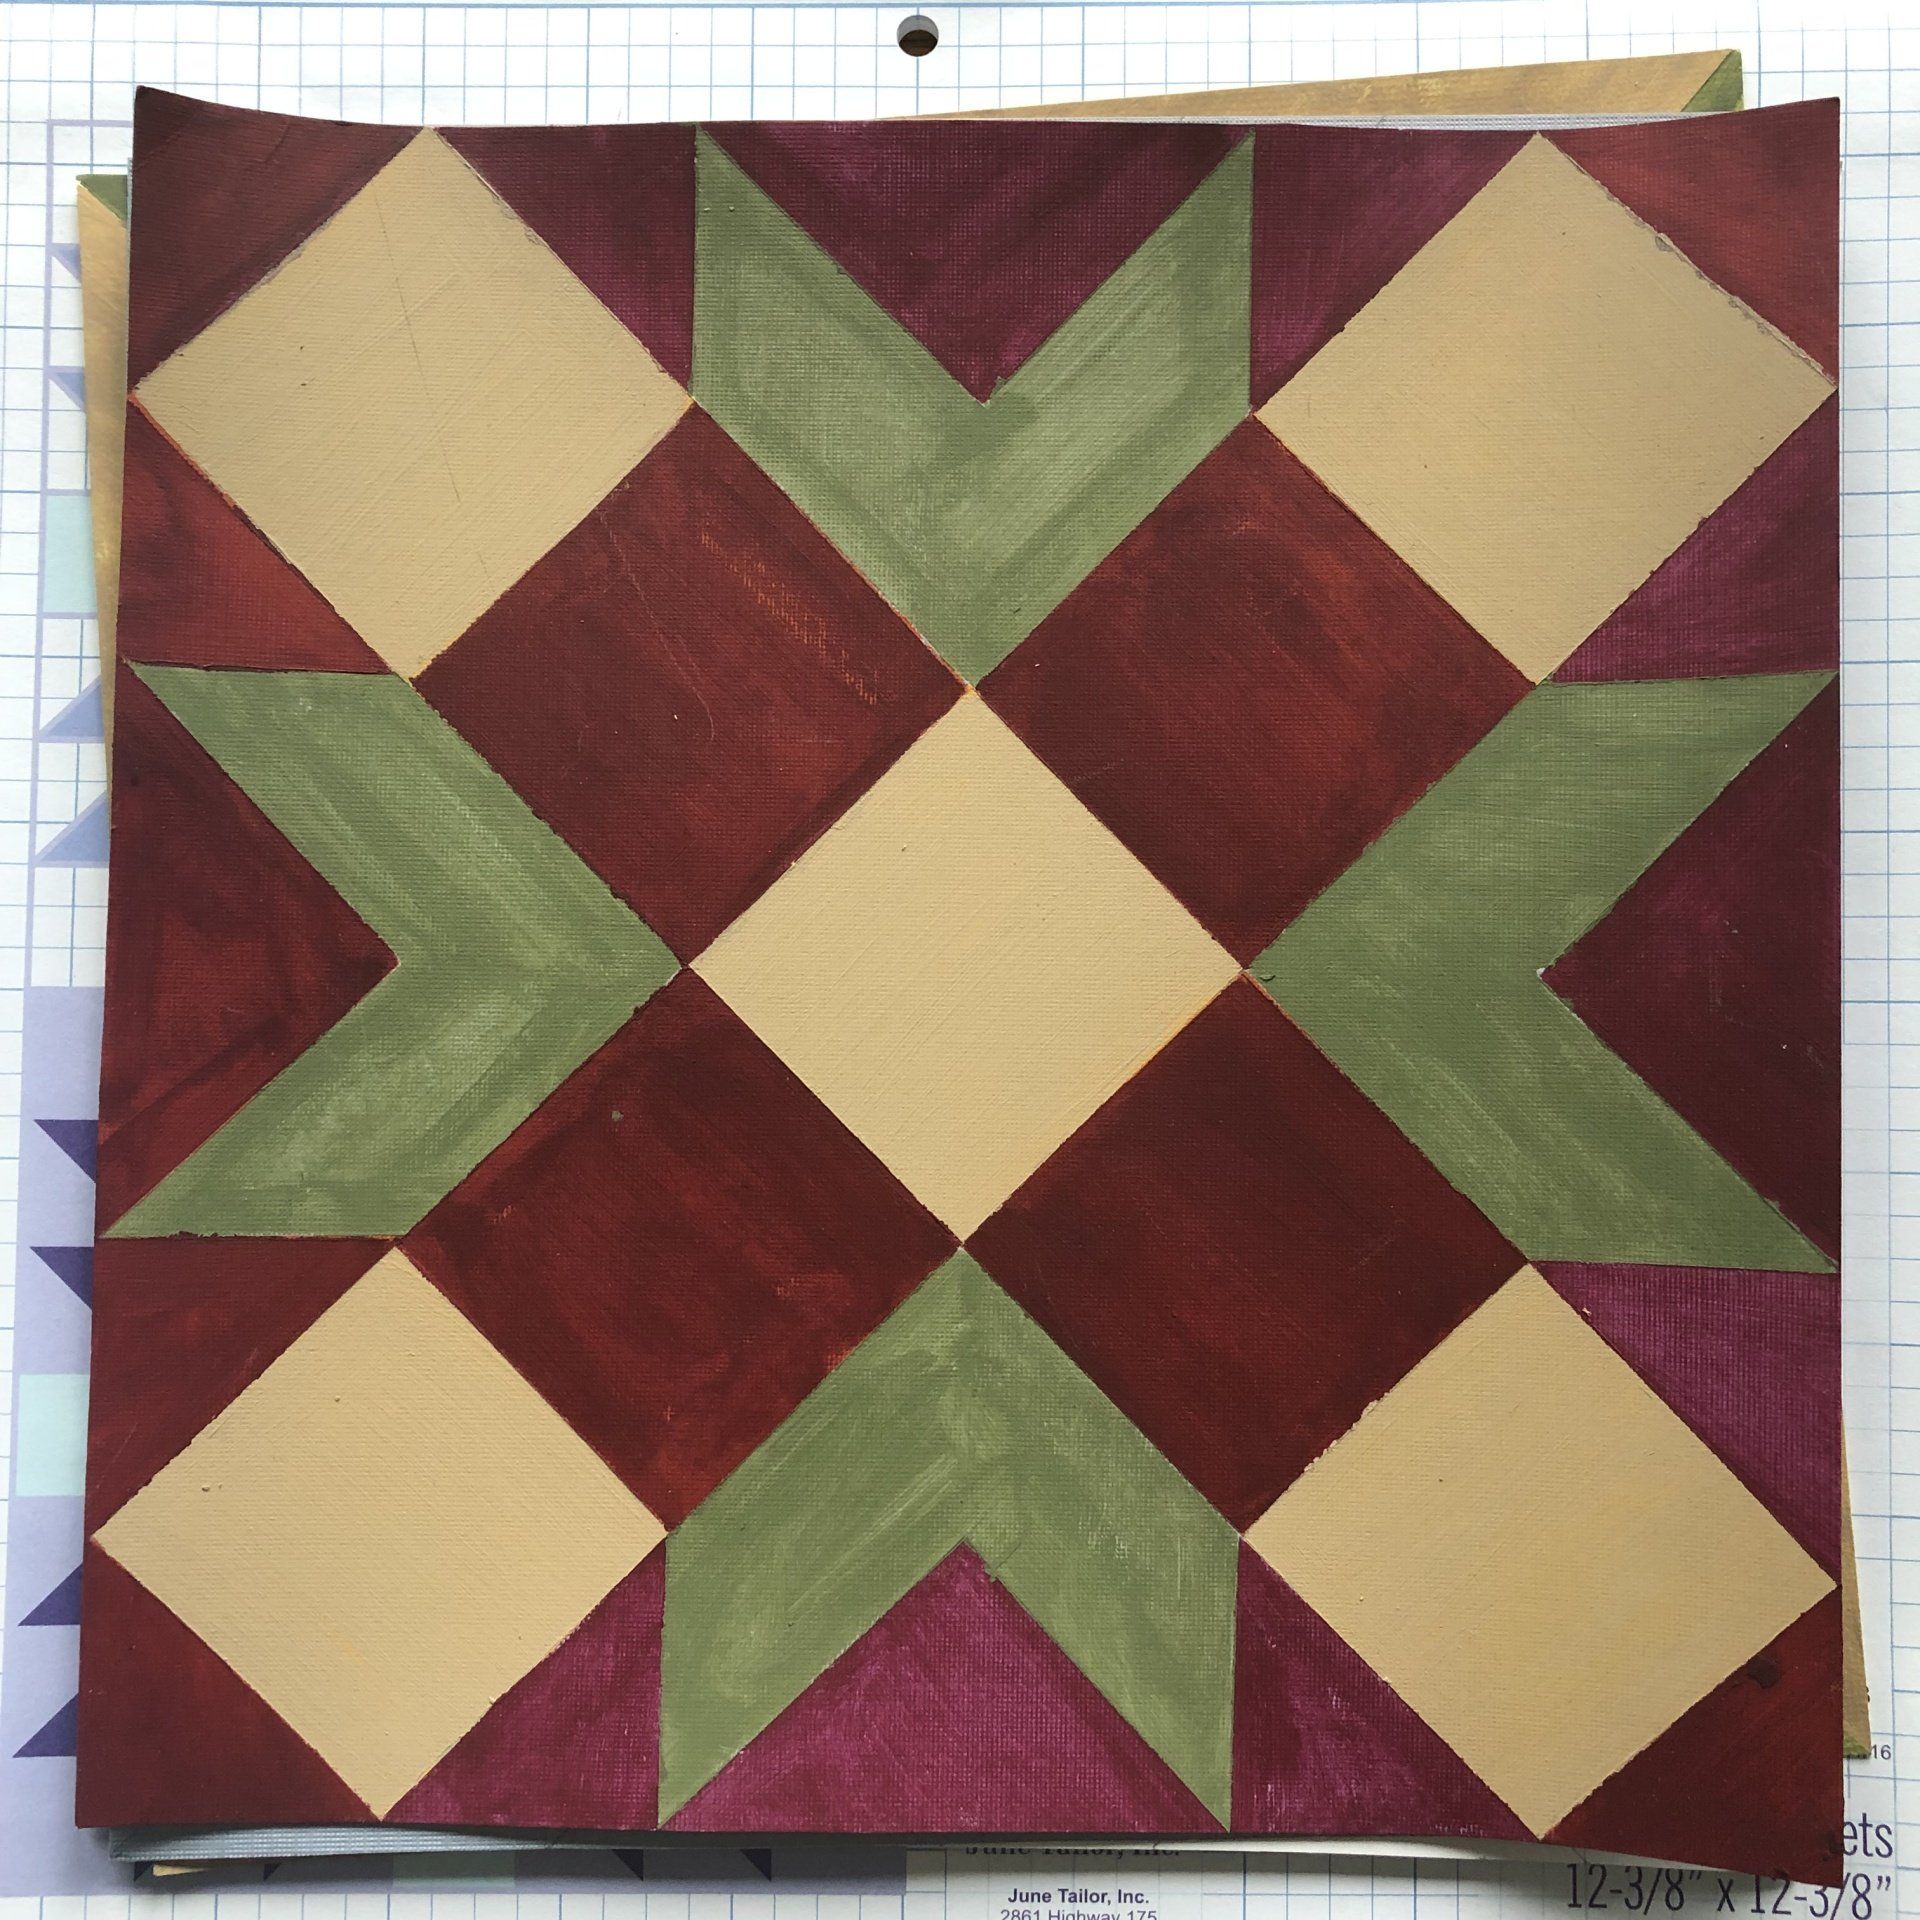
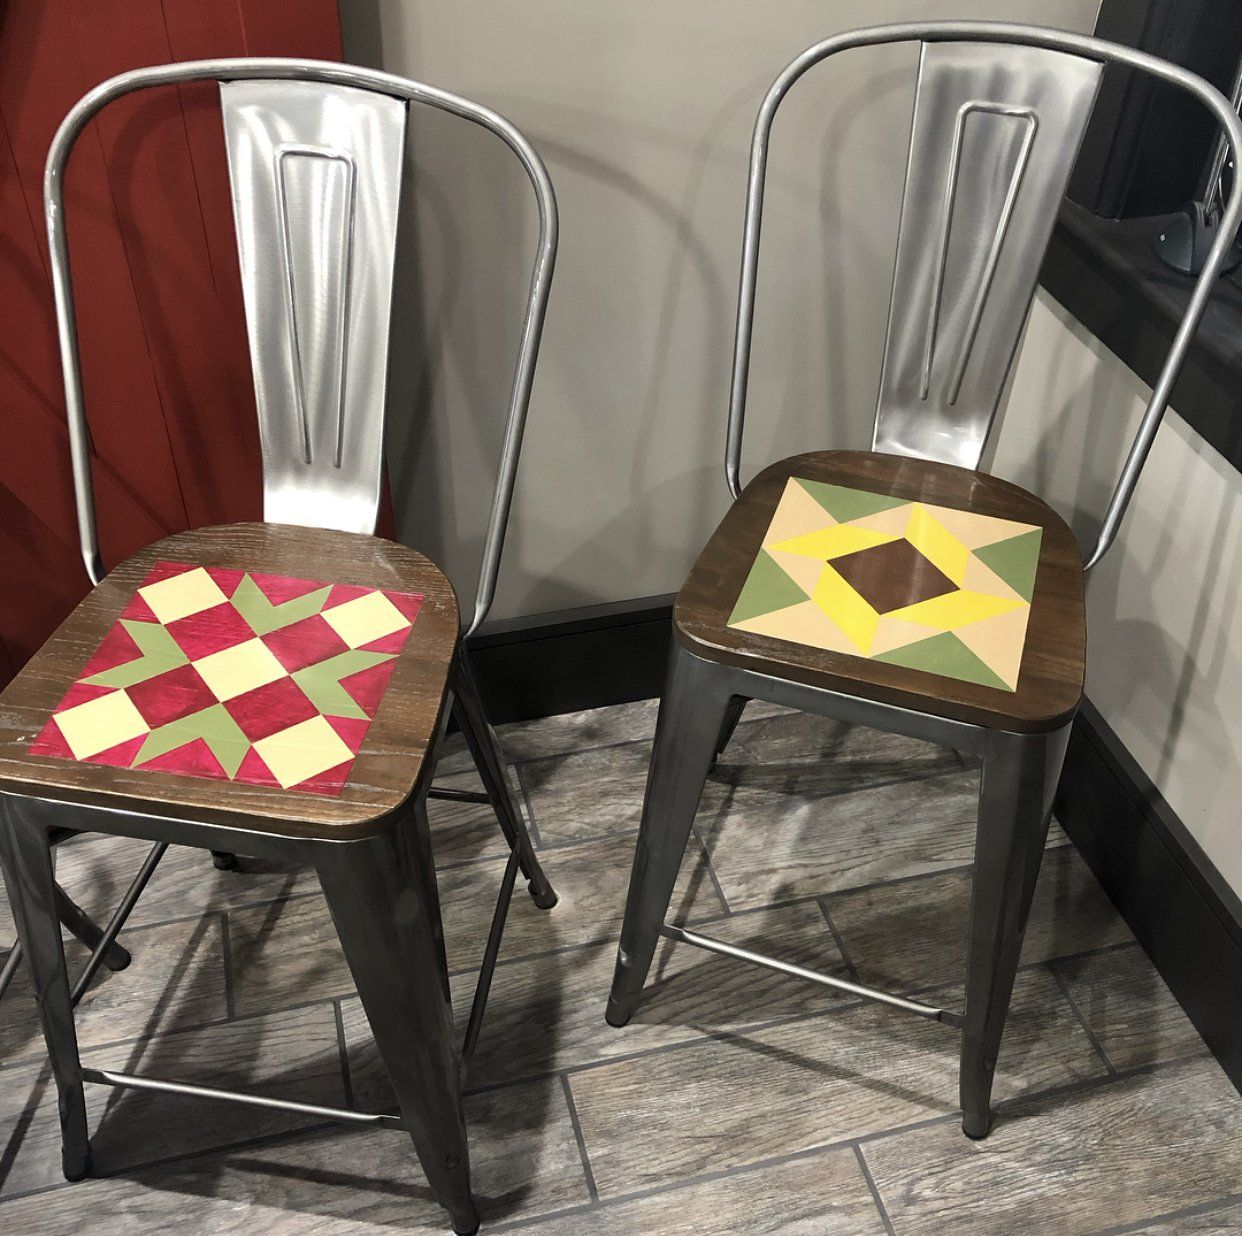
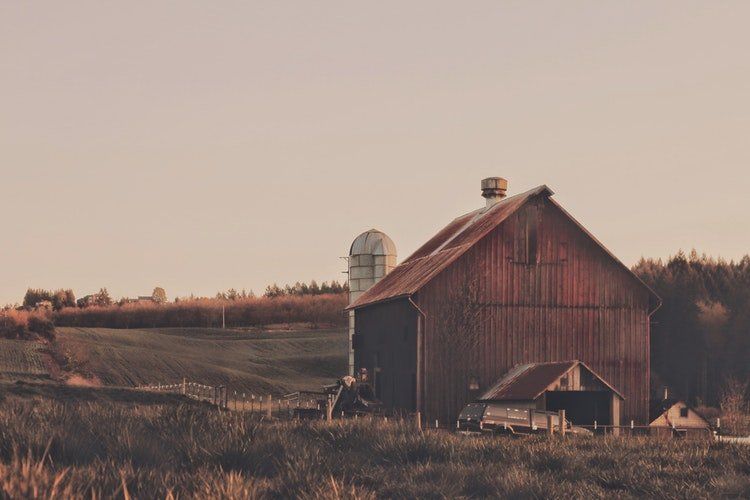
One of our latest projects was a six-piece set of barn quilt chairs for friends of ours. After renovating the spacious kitchen of their stunning 1800s brick farmhouse (yes, we are in love with that house), they reached out to us to help add a little more colorful flair. Custom barn quilt seats: six different designs, using the colors from the Tree of Life pattern on our barn.
Now, we’d painted a barn quilt chair once before, but this was an entirely new level. The real kicker? They left it all up to us. “Surprise me.” You know that feeling of anticipation in your stomach when you’re going up the first hill of a roller coaster? Yeah. That’s how we felt: excited, full of ideas, and anxious to get cracking.
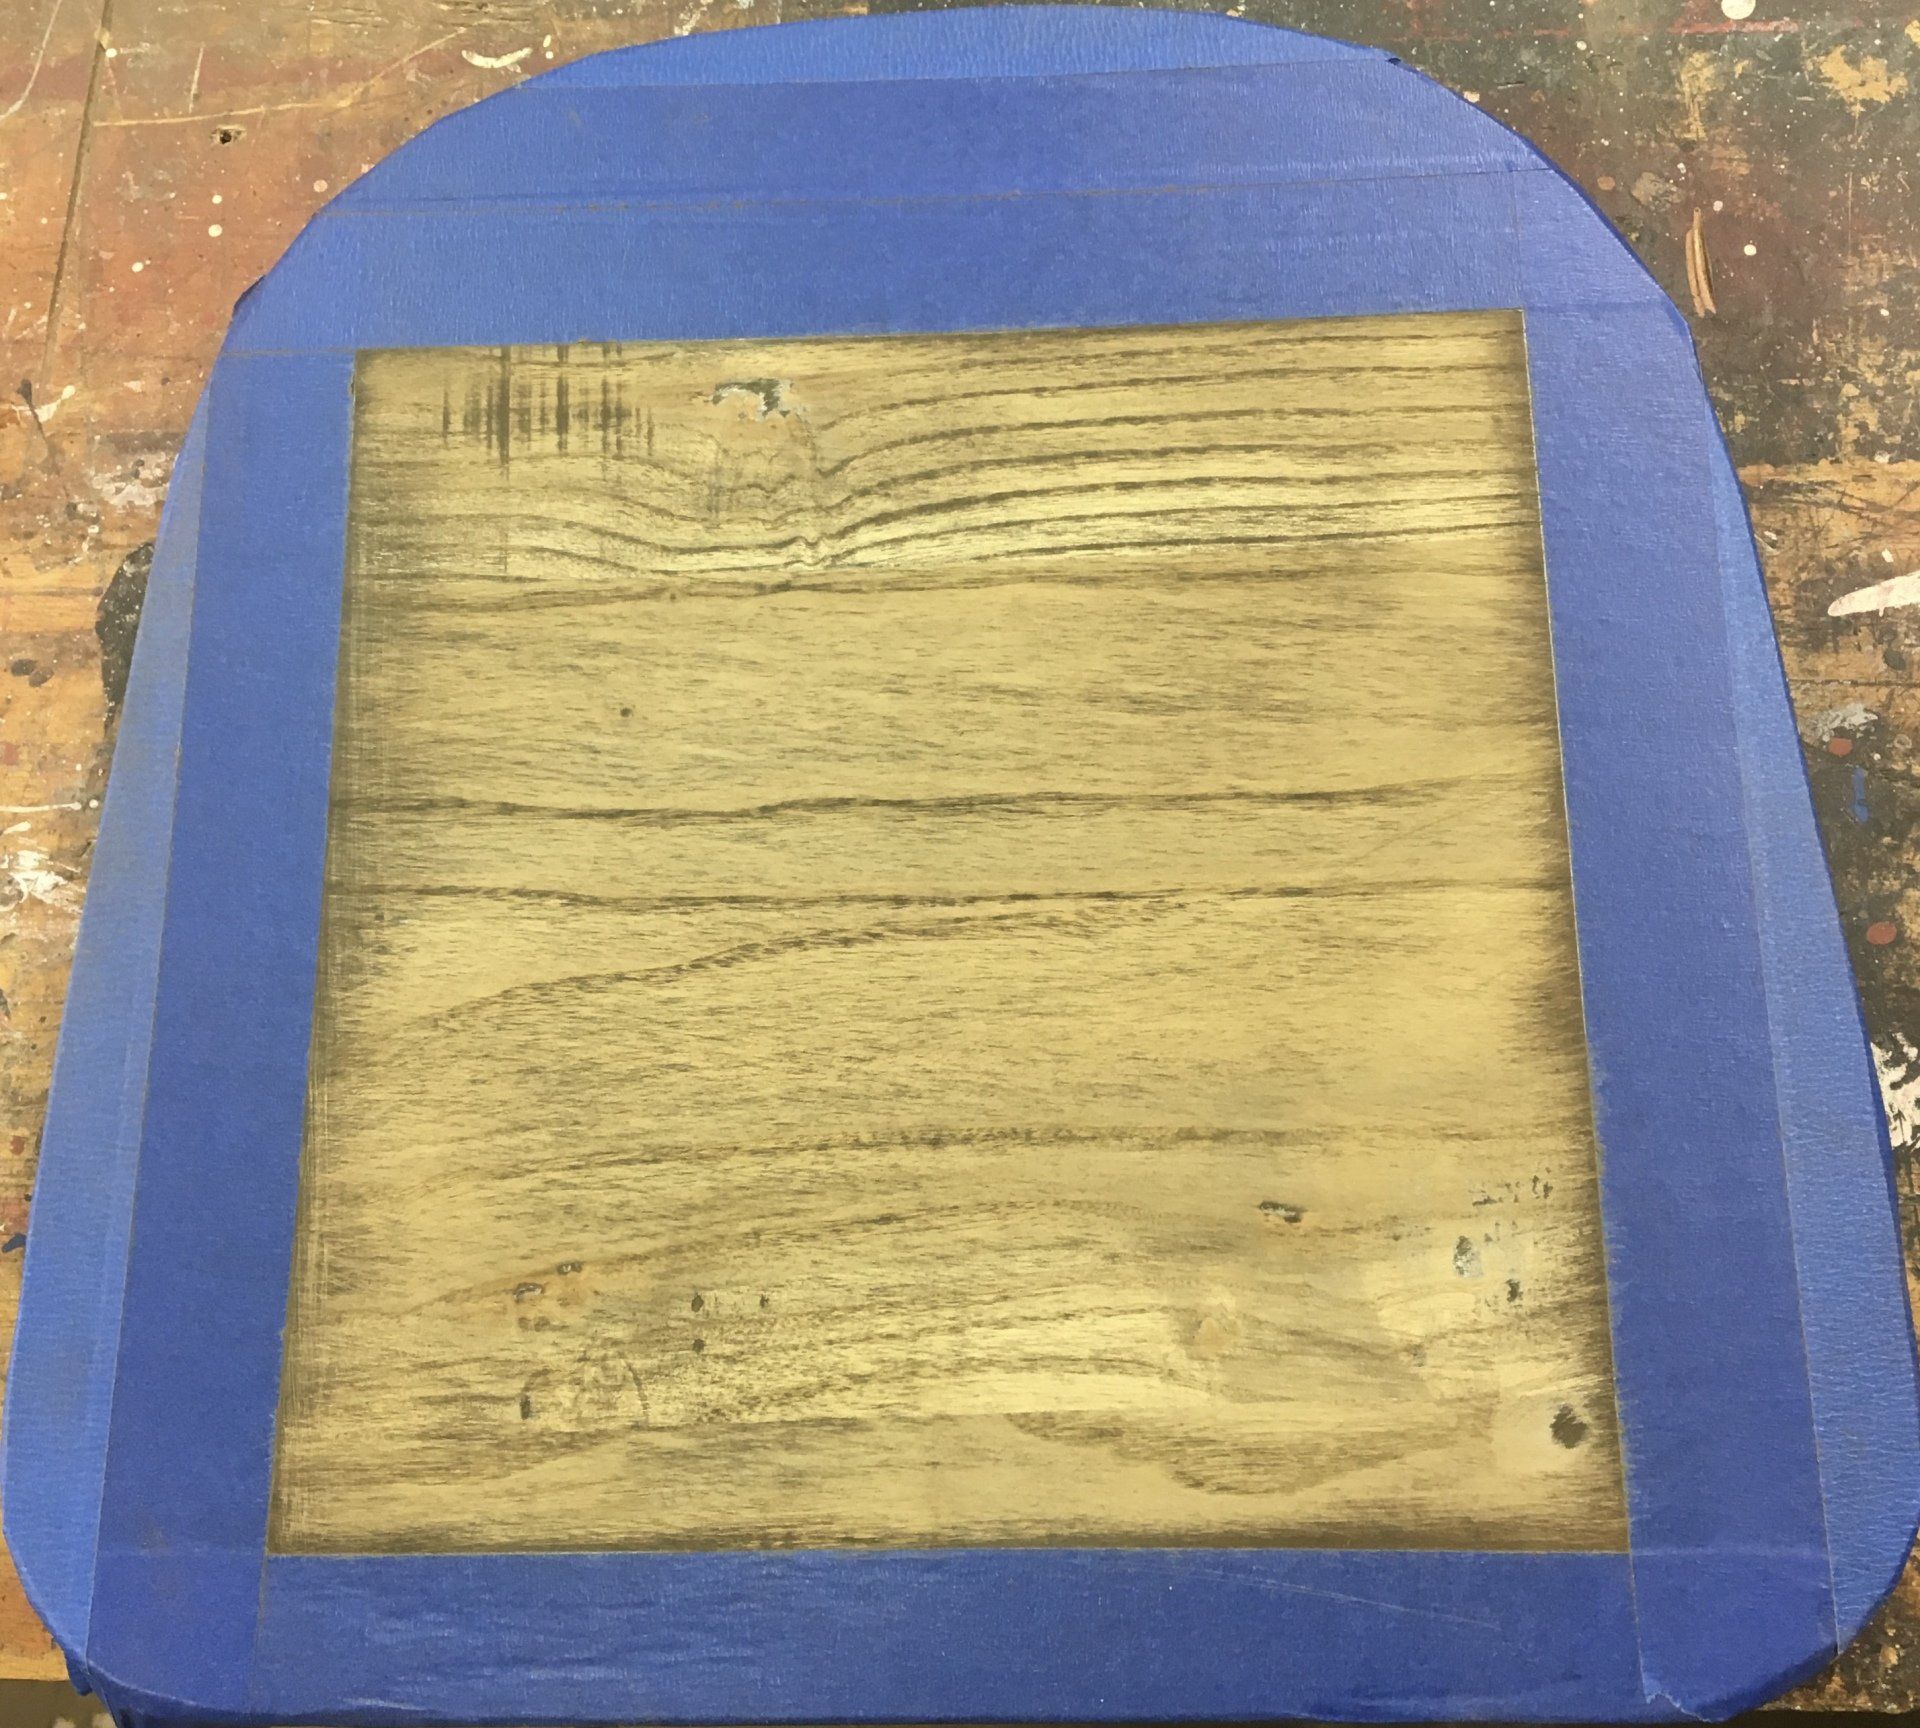
STEP 1: SAND, TAPE, PRIME
As is the case for many of our projects, our first step was to remove the current stain from the seats to get a smooth, clean surface to paint. We taped out a 10”x10” square in the center of the seat, sanded it down to the base, and gave it a few coats of solid white. Fresh and new, ready for sketching.
STEP 2 (BUT ALSO SORT OF STEP 1): DESIGN
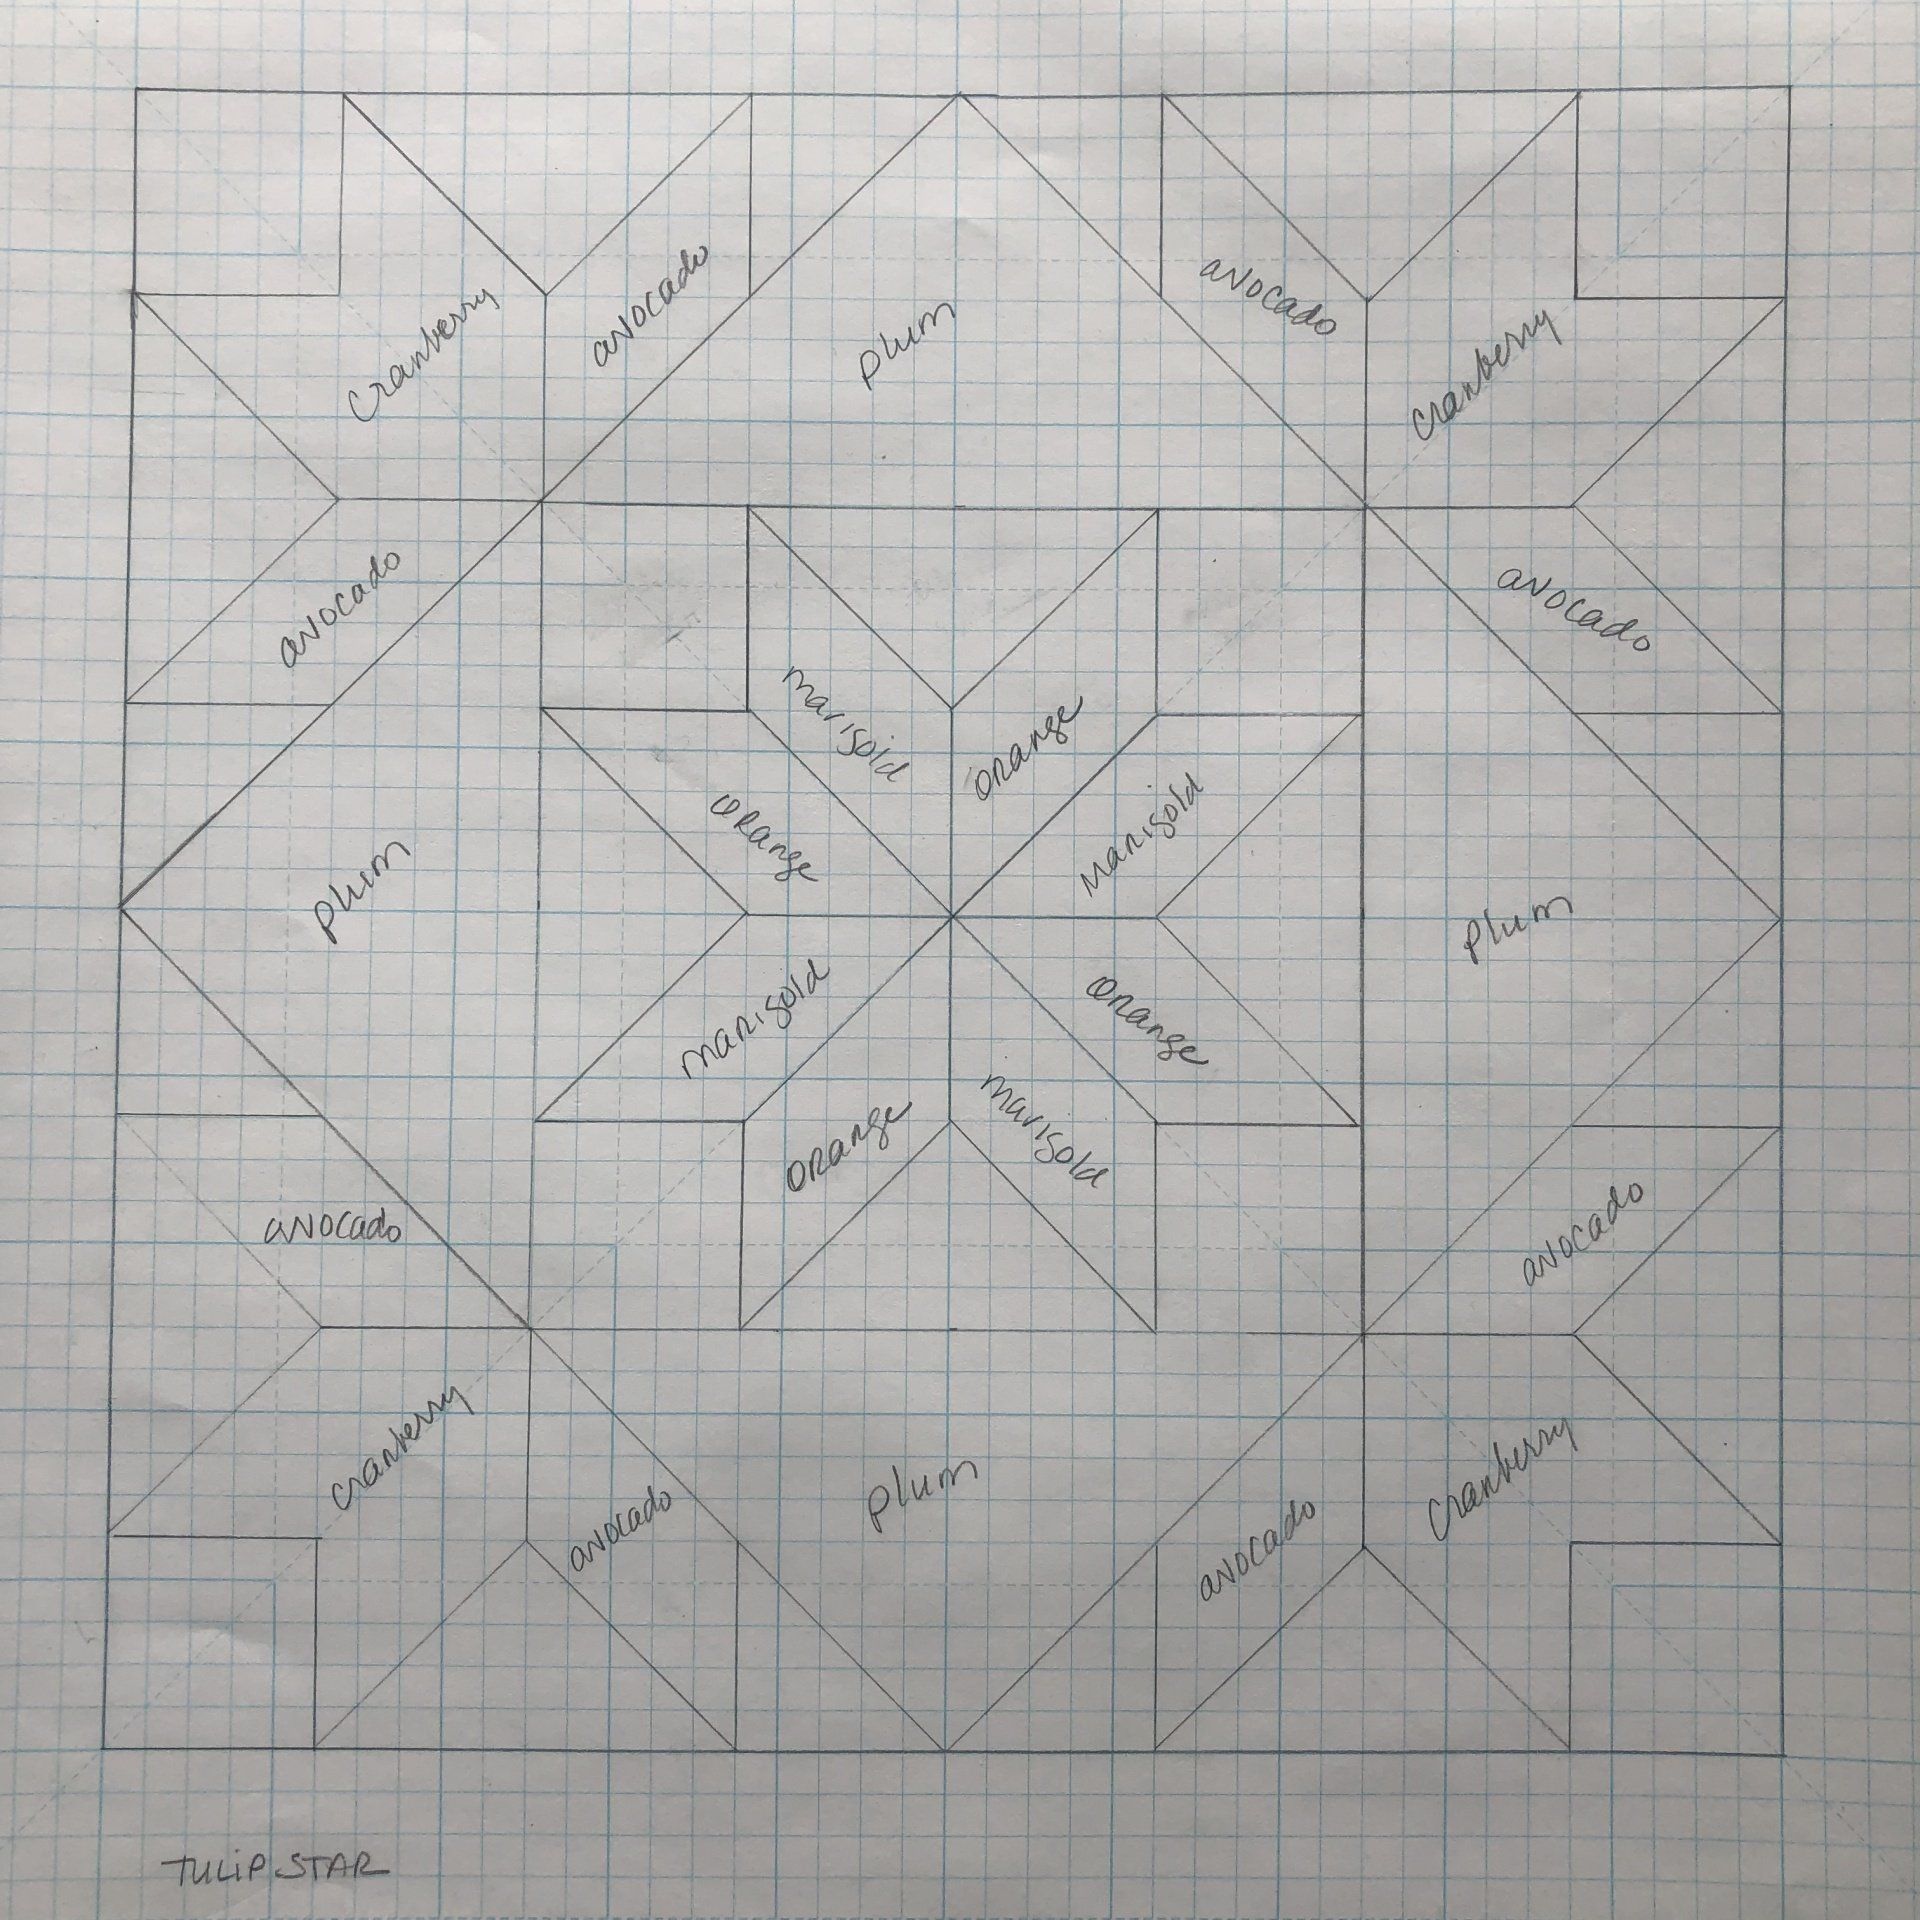
While Dick was in the shop prepping the seats themselves, Carol was hard at work sketching up different ideas for each seat. We wanted to keep a rustic, outdoorsy theme running throughout, focusing on elements of nature and colors you might see throughout the seasons. Some of the designs were a simple image, like the sunflower and the leaf; some were staples that we and our friends loved, like Farmer’s Daughter (Carol’s favorite); some were totally out there and mixed a lot of different elements, like the tulip chair. While none of them “matched,” it was important that they all go. Not too much of one color, but enough to tie them all together. All in all, quite a puzzle. A fun puzzle, though. Like Sudoku, but with paint.
STEP 3: RENDERING AND TRANSFERRING
Carol had the foresight to draw all of the designs on graph paper, so transferring the designs onto the seats was much easier than having to blindly slap a straightedge down and hope for the best. That made everything so much smoother. If we could give you one piece of advice from this project, it’s that. Use graph paper.
Once the designs were drawn, we made a few renderings on paper to get an idea of the colors we wanted. Like all great plans, they definitely changed about a dozen times before the final project. But we wanted to make sure that we had a variety of colors and patterns before we even thought about touching the seats, and even then, we changed our minds in the middle of painting.
STEP 4: PAINTING
Yes, the moment of truth. Somehow the most nerve-wracking part, even though it should’ve been smooth sailing from this point. We taped out every line to make sure no paint got where it shouldn’t be, and yet, nothing ever really goes to plan, does it? There were a few spots here and there that needed touching up, but overall, it’s an effective method. A little time-consuming, but it’s always better to take your time and do it right on the first go. Always.
We had some differing opinions about which colors went where, and one of the designs actually changed when we started looking at it on the seat. It just goes to show you that no matter how detailed and solid your plans are, you always have to be flexible. If something doesn’t look right or you have a sudden spark of inspiration, follow it! Allow yourself to explore that creative path. Let the muses guide you as they will. (There actually isn’t a muse for painting, but you didn’t come here for an ancient history lesson.)
Each of the seats received three coats of polyurethane to protect the paint, meld the colors, and give them a nice, glossy sheen.
STEP 5: DELIVERY
The best part, really. We’re not sure who was more excited to see the chairs in their natural habitat: our friends, or us! Overall, this was one of our most fun projects to work on. We got to flex our creative muscles and craft something entirely unique for our friends. Each design tells a unique story, and the longer you look at them, the deeper it goes. We’re so pleased with how they turned out, but even more so with how happy our friends were to have their chairs back. Apparently, they’d had to stand at the kitchen island to eat breakfast, so they were eager to see the finished product.
Got an idea for a custom project? Reach out to us and we’ll get started making your farmhouse dream a reality!


In this, our very first blog, we…admittedly struggled to settle on a topic. We have all these big ideas that we can’t wait to share with you, from gardening tips to recipes to decorating ideas and everything in between. And yet, we couldn’t decide what story we wanted to tell first.
Well, we were getting way too far ahead of ourselves, and we realized that the best place to start is at the beginning. So we’re going all the way back to the first lesson: Farmhouse 101.
What is farmhouse style?
“Farmhouse style” means different things to different people, of course.
For us, true farmhouse style is authentic, original, and straight from the barn. Some of the pieces we get literally come straight from the barn (dust and all), some are made from barnwood, and some we find along the way.
When we think farmhouse, we think:
· Raw wood
· Corrugated barn tin
· Galvanized metal
· Gingham
· Burlap
· Twine
· Cotton
· Wheat
· Warm rustic colors
· Natural distress
· History
That’s not to say that manufactured pieces, crisp white everything, and replicas of old farm-inspired items are bad. They’re just a little more modern and urban. Hence the term “modern farmhouse.” Imagine having pristine white furniture and coming in to relax after working the fields outside all day! My grandmother would’ve had a fit trying to keep a modern farmhouse clean.
We just prefer to focus on genuine craftsmanship and unique pieces with unique stories that we can share with you.
I like farmhouse style, but it doesn’t match the rest of my décor. How can I incorporate it into my home?
Start small! Try dedicating one room or area of the house to the farmhouse look. The laundry room, guestroom, or even home office are great places to start. They’re fairly unassuming spaces that are often overlooked when it comes to decorating. In these rooms, you can take a few more liberties since they don’t necessarily have to match the motif of the rest of your home. That unfinished basement? Deck it out and make it a canning kitchen or a farm-inspired entertainment space.
Outdoor spaces also naturally lend themselves to farmhouse décor. Decorate your landscaping, porch, patio for any season or holiday with staple pieces like milk cans, galvanized buckets, or wagon wheels. Then, mix and match seasonal florals, vegetation, and fabrics to give them a fresh new look!
Do I have to cover my entire house in shiplap?
Only if you feel so inclined.